Don’t worry, this is totally a different 16n Faderbank post. I know you’re worried.
I said don’t worry! Here, take a PCB shot, you like these right?
There you go. Good reader, nice reader. Sit reader!
Sorry.
This post will, hopefully, do a couple of things. First, it will be a diary of my journey getting PCBs manufactured overseas, as well as cases, for the 16n Faderbank. Second, it will give people some insight into the process if they want to get their own PCBs manufactured.
Thanks to the 16n Faderbank crew, you’ve got all the crucial files you need to get the 16n components manufactured on your own. These components being the case and PCB. You can use these files to pump them out in your super cool workshop, or you can outsource that work to someone who already has the equipment to do these things.
That’s what we’re doing here! AND I DON’T WANT TO HEAR ANOTHER WORD ABOUT IT READER. Thanks baby, appreciate it.
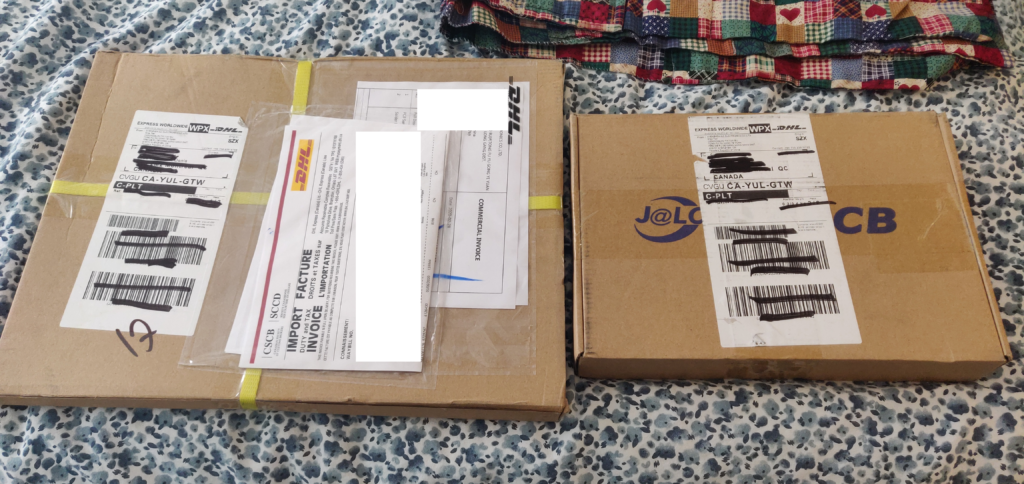
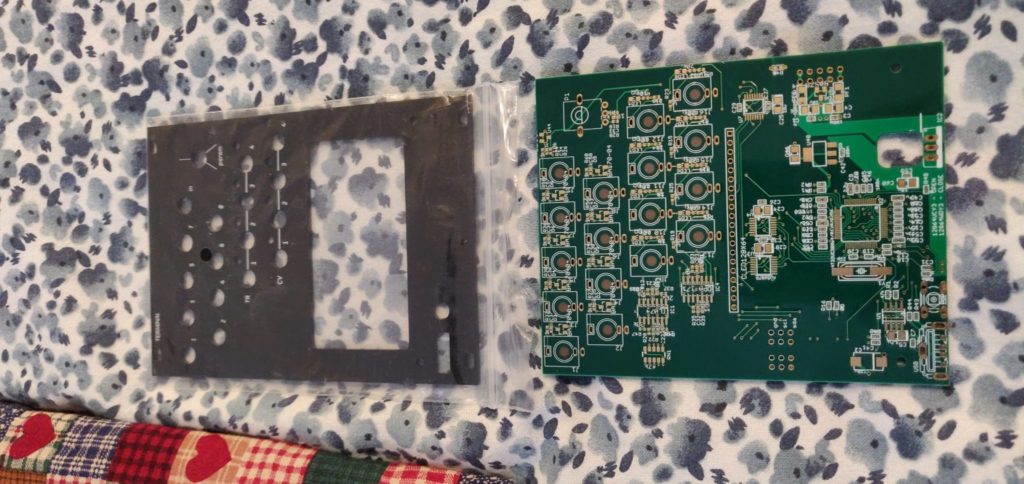
Ouuu what are these? Well they are JLCPCB PCBS! But how did we get here?!
Let’s start with the PCBs.
If you want to go with someone within North America, I have heard great things from Oshpark. I also know their web interface makes it super easy to upload and buy some purple PCBs regardless of the files you have. Gerbers, EagleCAD, or KiCad. Whatever you’ve got, Oshpark has you covered!
They’re also unreal expensive when compared with their Chinese counterparts. So I did a little research, and the two most recommended companies I’ve come across are seeedstudio and JLCPCB.
I went with JLCPCB because the shipping seemed faster, and it was a bit cheaper. Their user interface also worked a bit better.
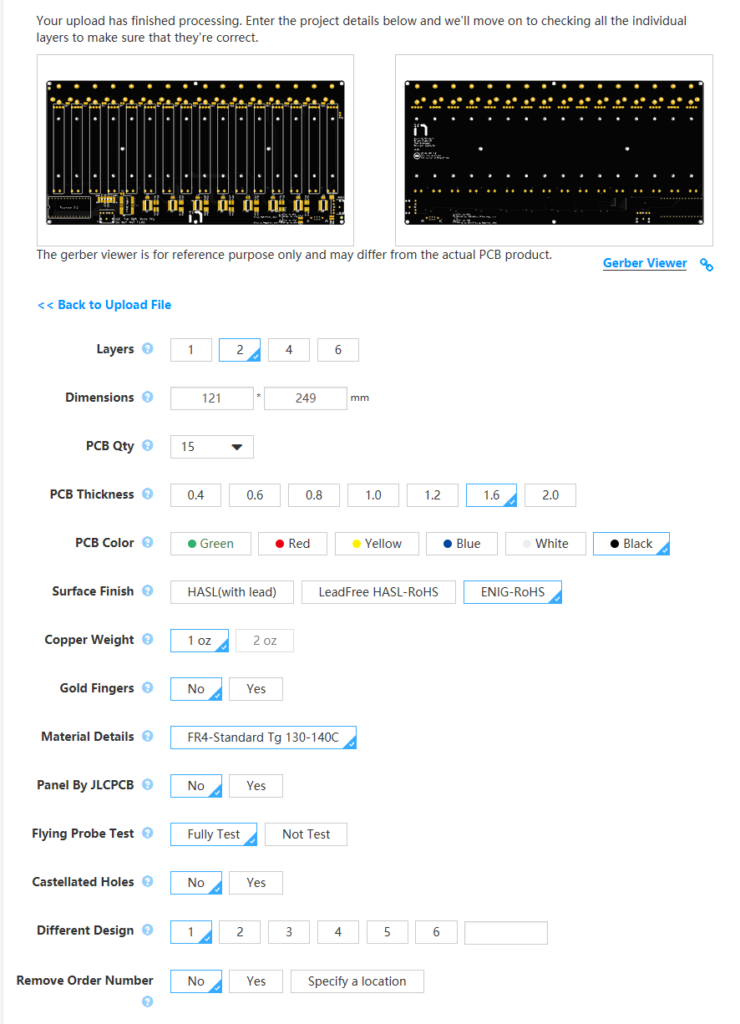
This is how it all begins, as you can see I have added my ZIPPED Gerber files to the website's interface.
The most confusing aspect of this process is deciding what surface finish you need, or if 1oz of “Copper Weight” is enough, but the default selections are not too far off from what you “need” for producing the 16n Faderbank PCB. After the Gerber files have been uploaded, you are presented with a viewer with your future PCB design.
Black PCB with gold pads? Stylish.
The website should pull your PCB’s size in mm, but always double check these numbers. Don’t want any surprises with larger quantity orders.
The above picture lists all the material choices that I chose to get this PCB printed. It would be the same for many electronics projects, but don’t stray much further than the colour here if you have no idea what ENIG-RoHS means.
Also, you don’t have to be in the ENIG-RoHS dark forever! Here is a tidy little blog post that explains the differences between different PCB surface finishes quite well.
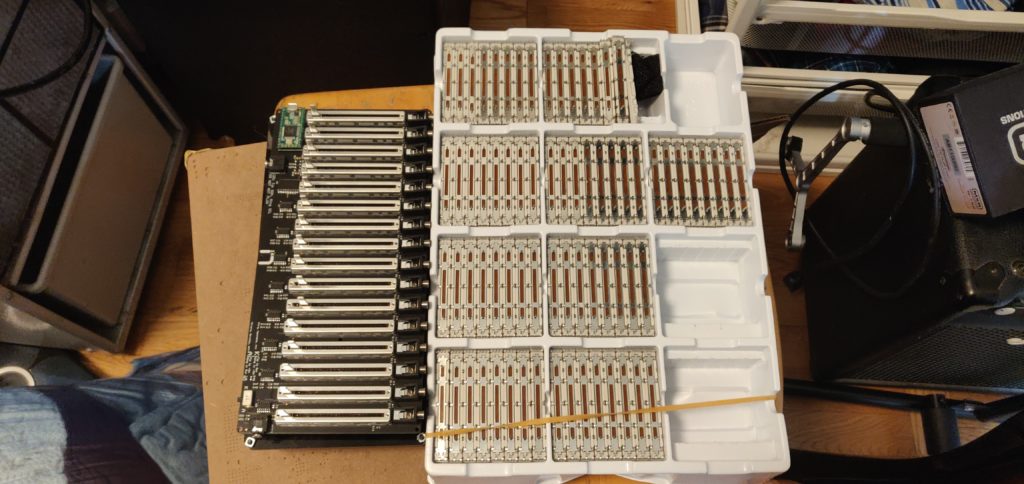
And a few weeks later, here they are!
15 of em!
I was super impressed by the quality of the PCBs. They look great, solder well, and after putting one together, I can also say they work!
One thing I cannot stress enough though, really be sure your design is done when you make your purchase. I am kicking myself for not modifying the PCB layout to include the footprint for different, not so expensive sliders.
Oh well, at least these ALPS sliders are super nice. And now I have a small fortune’s worth of them.
These sliders wiped out my future child's education fund...But man do they slide smooooooth.
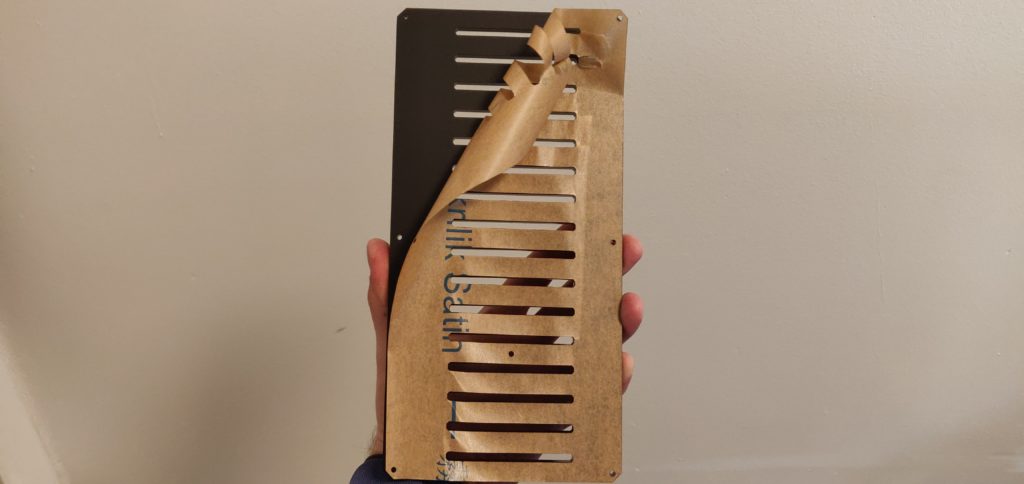
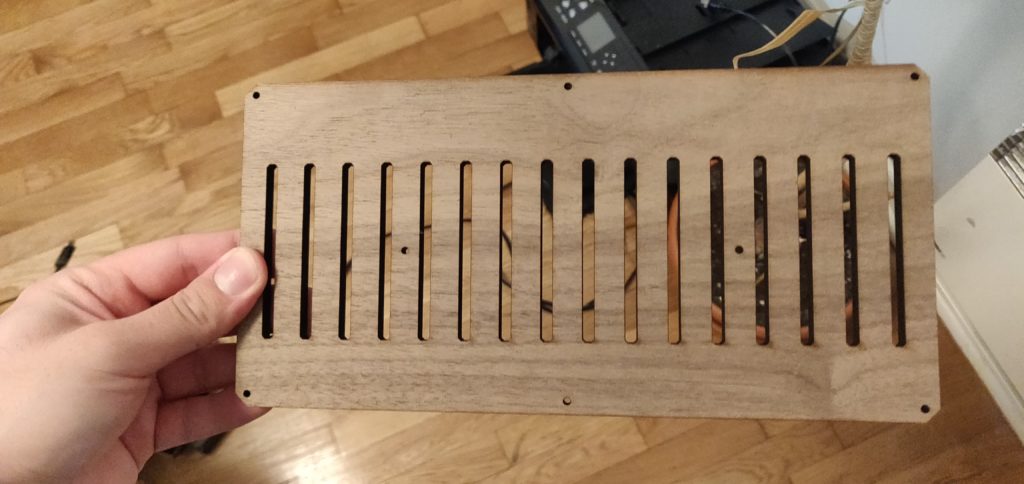
That’s all fine and dandy, but what about the case? I hear you dear reader, and that is where our friends at Ponoko come in.
The process was super simple. There was some confusion about the size of the drawing (they got in touch before they started cutting, which was great) but other than that everything was simple. It was also pricey, we’re talking Oshpark levels of pricey. But for what you get, I’d say it’s worth it.
The peeling was super satisying. The smell, not so much.
I grabbed a couple in this style as well. I think the black acrylic is nicer, but a little stain on this bad boy could be gnarly.
A couple of Ponoko pointers for my printing pals. First, when your order arrives, open the package outside. Maybe it was the acrylic or wood veneer I chose, but oh man the smell was awful. I’d also recommend leaving it outside for a bit after breaking it all down, get that smell off your parts.
Second, don’t try to fit M3 screws into M2.5 holes and expect the acrylic to be super happy about it.
Anyone want a discounted 16n?
And that is really it! Hopefully this post can help others get their own projects off the ground. Checkout my first Faderbank 16n build diary to see how to actually put one of these things together, and get ready for a Monome Teletype build in the very near future.
OUUUU daddy is this going to be a blast! Here I come 0402 passives!